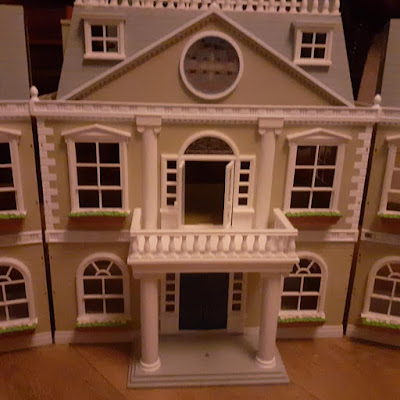
This is an indoor doll's house to haunted house conversion
A bargain find
I was very fortunate that I was able to pick up this plastic Sylvanian Families mansion doll's house on Facebook Market place for £15. It was a local collection and perfect for what I had in mind for this project. I have never done a doll's house conversion or dollhouse make-over before and certainly nothing similar since I was a child. So with lots of ideas and ambitious ones at that I did set myself up a bit to fail. If I was doing this again (and I probably will) I'd do more research into fixing materials (glues etc) and techniques. Overall I am happy with the end result, as a first attempt I love it.Not smooth sailing
I would be lying if I said this doll's house transformation and makeover was easy or worked out perfect on my first attempt, it didn't! I have never done a doll's house conversion before and I had no idea how to approach achieving the effect I wanted which was to cover the house with pebbles for an authentic rustic, weathered (distressed) look. I experimented with various glues and had to take it all off when different things I tried either didn't fix as well as I wanted or didn't look how I wanted. The finished look is not exactly what I was aiming for but for a first attempt, I am happy with it. I will detail how I created this look but as a none professional crafter, follow my lead with caution! Hopefully, I will have a better idea of what I am doing on my next doll's house do-over!
Getting Started
1. preparing the dollhouse surface
2. Pebble dashing the dolls house surface
3. Moss covers a multitude of sins.

4. Adding the flowers
 I used dried flowers that I already had to add color to the moss. I used Lavender seeds, Chamomile flowers and Marigold petals. I also had some Mugwort that I sprinkled around. I secured the moss using PVA glue. That took a couple of days to properly dry out after which time I added a little bit more and then sprinkled the dried flowers onto it. It dries clear.
 Trees, Climbing Vine and Swing
6. The climbing flowery cheery blossom vine
7. Painting the doors and window frames
8. Polymer Clay people and pets, pumpkins, bucket and broom
I hope you like my creation, please do share your thoughts and ideas for improvement in comments and any projects of your own where you have converted or upcycled an old doll's house.
Materials Used
- Sand paper to rough up the plastic surface of the dollshouse.
- Concrete to secure the pebbles (also grout, wood glue)
- Pebbles for the pebbledash effect.
- Fine sand for in between the pebbles.
- PVA glue to secure the moss and dried flowers
- Glue gun to secure the plastic figures (cats and characters in windows).
- Glue gun to secure the twine and lace flowers to the tree branches.
- Acrylic Paints
- Permanent color marker pens
- Needle felt wool for the girl on swing
- Polymer clay for cats and people in windows, pumpkins, broom and bucket
- Pine cones (painted) for trees and small shrubs
- Potpourri, dried Lavender seeds, Chamomile flowers, Marigold flowers and dried moss for the material covering the house
- Leafy twine
- Flower lace ribbon
- Birch Twigs for larger trees
- Gravel pebbles (small 3-10mm) for pebble dash effect on house and loose on path.
- Blue slate for chimney breast


Social Plugin